Setting up your Google Sheets Action
2 min read
Each time your
-
Once you test your Trigger data, you need to select an action app to use with the Trigger.
-
To add this action app to your
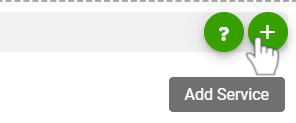
, click on the “add service” button. 
-
Select “Google Sheets” as your Action app from the list of
. -
Connect your Google account to Rapidomize and authorize Rapidomize to access your Google Spreadsheets.
-
Follow Guidance How to set up Google Sheets on Rapidomize. Once connected, press “select” key to select your Google Sheets account.
-
Select the action Add rows to a spreadsheet from the list of actions.

-
Select the spreadsheet that you want to “append data” to .
-
Select the relevant sheet.
-
Define the “range of cells” from where the data to be appended.
The range of cells you specify when configuring are used to search for existing data in the sheet. If any data exists in this range, new values will be appended after the last row of the existing data, starting with the first column of the table.
-
You can select your cell range from any location of your Sheet. It does not have to be from the top.

-
Once you define your “cell range”,
will append the rows below your cell range. -
If source data has 5 data items that need to be appended, you need to define 5 data columns under “Range of cells" in sheet notation.
-
Do not include column names or titles for your selection.
-
Specify how you want to map your data in the given table.
-
Select your data values from the drop down menu of each mapping row (each selected value will be displayed as a macro {{# … }} ).
-
Table entries will map to a single row of your sheet every time your
executes. -
Test your action by clicking on “Test / Get Sample Data”.
-
Save your
by clicking on “Save ”. -
Click on “Status” icon on the card to see the status of your
from the Dashboard. -
Once you activate your
, it will run according to the specified schedule.