How to create a quick interface to capture data
6 min read
This page shows you how to create a form using Rapid Interfaces. In this example, we are going to create a form for Sales Staff to provide their order details to the Main office.
Once you create the form, you can connect it to a database/Sheet (Google Sheet, in this case) and collect data automatically by creating a workflow (ICApp) very easily.
Use this no code feature (Rapid Interfaces) and create any type of form to collect data and analyze your responses in real-time using workflows. Use this easy and simple feature and increase the productivity of your business.
Setting up
Note
As a pre requisite, choose an existing project or create a new project before creating your App/device. Refer How to create a project..-
Click rapid “interfaces” icon
 on the Menu.
 -
Click on the (+) button to start creating a new rapid interface.
-
Enter a name for the new rapid interface.
-
Click create/edit rapid interface button
-
You will be directed to the “rapid interface editor” where you have all the UI widgets that you need to create an interface on your left hand side.
-
Start creating the layout of your form that will capture order data.
-
Click on the “form” icon and drag & drop it to the screen.
-
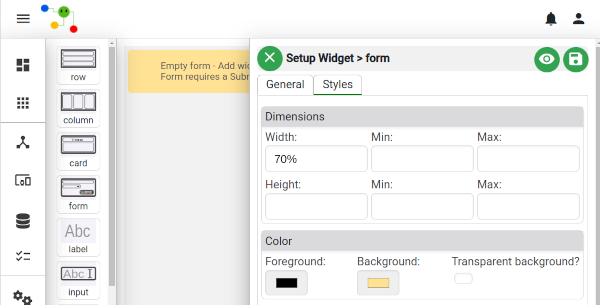
Click on the “settings” icon on the form and select the “style” menu.
-
Select the dimensions, color, font size etc. for the form as per your wish.
Put the Form Title
-
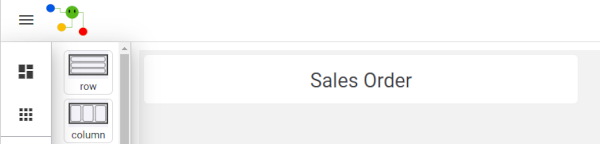
To put a Title to your form, drag & drop the row widget to the form. Drag and drop a label widget in to the row and click on the “Settings” icon (which appears when you hover your mouse) of the label widget, and type the Title of your form. Select Styles to specify font, color etc. for the title. If you want to center your title, you need to set the display as “flex” and margins as “auto”. Then click on the “Settings” icon of the Row widget and set display as “flex”.
-
By adding more row or column widgets, which act as containers that allows you to create a layout, you can enter any amount of additional information to the form at any place.
Add Fields to the form
-
Start adding inputs to your form. You can use either labels or placeholders or both to label your form input controls. (Here we are using labels as input controls)
-
Select label widget, drag, and drop it inside the form. (Cursor needs to be inside the target container when you drop it).
-
If needed, modify label names and the styles by clicking on the “settings” icon of the label widget.
-
Drag and drop an Input widget in to the form. Click on the “settings” icon of the input widget, and select the “General” Menu. Select the input type (text, number etc.) and type the parameter name. Parameter name should be unique as it allows us to bind each data item to the specific parameter when you submit the form to a specific workflow (ICApp).
-
Click on “Styles” menu and design the input field as per your wish.
-
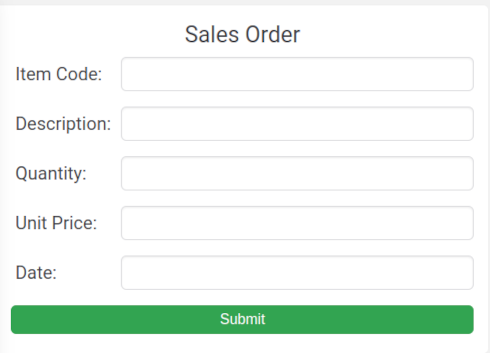
Add the remaining fields of the form following the same method, dragging, and dropping label and/or input widgets or any other widgets of your preference from the menu.
-
Once you have completed designing your form, save it using the Save button at the top right corner.
Create your workflow
-
Click the “settings” icon of the form and select the workflow (
) you will be using to submit your data. Eg: You can send the captured data to a database/ERP/person/group (using Slack, Email, SMS, PUSH notifications etc.). If you already have an to use, go to item 32. -
If you want to create a new
(design a new workflow) for this purpose, click on the Create an button and create the of your preference (rapidomize/getting started) -
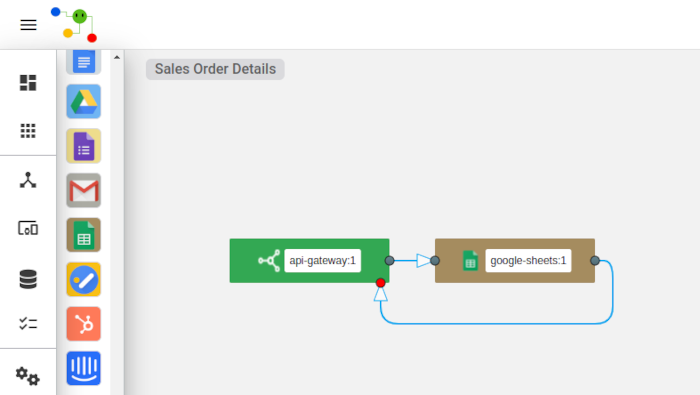
In this particular ICApp, we are going to save the captured sales data in a Google Sheet to have the up to date information on Sales at any given time.
-
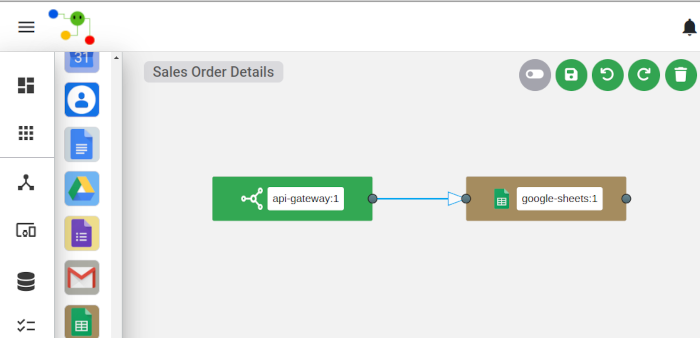
For the above ICApp, your trigger could be either API gateway or My App and your action is Google Sheets. Drag and drop both, to the “workflow worksheet” and connect them.
-
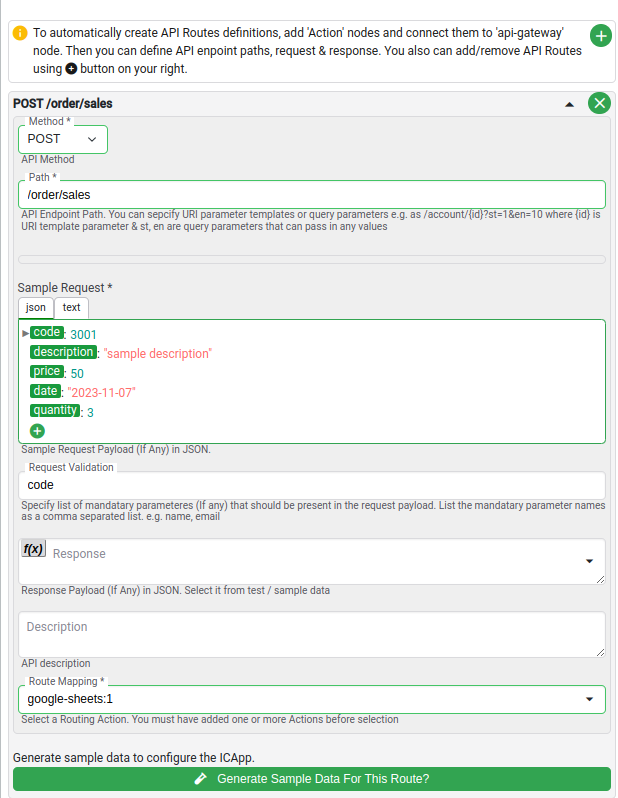
Select “receive API requests” from the trigger (API gateway) and define your API end point. If API route is not visible, click on the (+) button on the settings panel.
-
API method should be “POST” and path needs to be specified as path /order (/ followed by “one word name” to identify your target endpoint).
-
Under sample request, construct a JSON to match your form data. E.g: If you capture “Item code” and “ Item Description” data, the JSON should be: {“code”: “3001”, “description”: “sample description”} Include all the parameter names along with their sample values of your form to this JSON.
-
You also have the option of specifying “mandatory parameters” in the API request. If you specify mandatory parameters, the data that does not have the specified mandatory parameters will be automatically rejected.
-
Type the API description (optional) to distinguish your route.
-
Select the relevant route mapping from the drop down menu (if it is not already selected). For this ICApp, the route is “Google Sheets”.
-
Click on Generate sample data button for route. You will see the sample data.
-
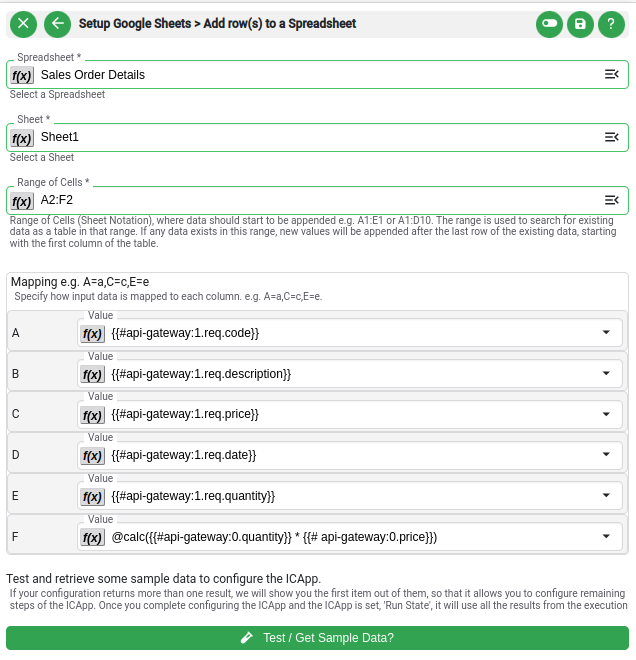
Click on your action (Google Sheets) and select the specific activity you want to perform. Here, select the action “add rows to a sheet” and select a “spreadsheet” and the particular “sheet” you need the order data to be recorded.
-
Specify the places where you need to record the data under “range of cells”. Here, we are selecting A2:E2, since we have five fields of data (parameters) in the order details form.
-
Map the data of each field to relevant column by selecting the relevant data from the drop down menu.
-
If you need to use mathematical functions, click on “f (x) and select the required function, you need to apply to the data of the particular column. Here, we need to multiply the value of “Quantity Ordered” with the “Unit price” to get the value for “total sales value” column. Therefore we click on f (x), select “calc( )” as the function for multiplication, and then select the two macros we want to multiply. E.g. calc({{#api-gateway:0.qt}} * {{# api-gateway:0.price}})
-
Once all fields are mapped, click on Test and get sample data to create a sample row in the selected Google Sheet.
-
Next, connect the “Google Sheet” node’s output port to the API-gateway node’s response port (red colored). Select the response from the dropdown. E.g: {{#google-sheets:1}}
-
Save the workflow by clicking on Save button and click on Run button to start the workflow.
-
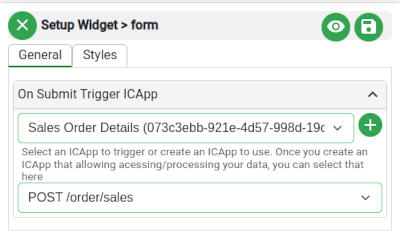
Now, go to your “Form”. Click on “Settings” and select the workflow you have created.
-
Select the ICApp’s API end point.
-
Save the rapid interface form layout by clicking on “Save”button. Preview it for testing and do any necessary changes, if required.
-
You can access your form by clicking on rapid interface icon and selecting the particular application card from the list.
-
In this example, since the form is automated to a Google Sheet through the ICApp, hereafter, every time a sales agent submit this order details form, his sales data will be automatically transferred to the Google Sheet along with the pre specified calculations etc., and we will have up to date sales information with us at any given time.