How to set up Schedular
2 min read
Trigger
Use automated scheduling and avoid delays, errors and mis-organized calendars. Use it to trigger workflows periodically. You can use this Trigger to schedule a job (trigger Action(s)) or to perform batch jobs (Cron jobs). For example, you can use Schedular as your Trigger node:
- To send an SMS daily.
- To send a reminder hourly/daily,
- To send Emails to customers on their monthly usage of a product/service from Google Sheets.
- To schedule meetings based on your data.
When you select Schedular as your Trigger node, you can:
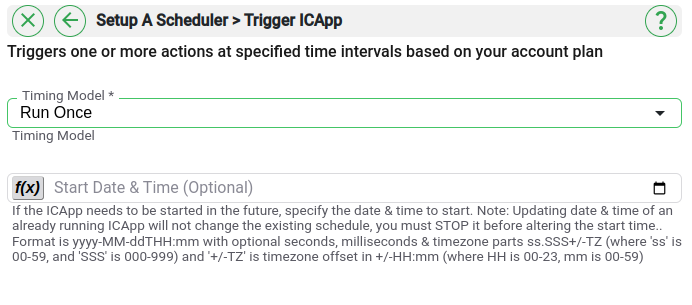
- Set the timing to
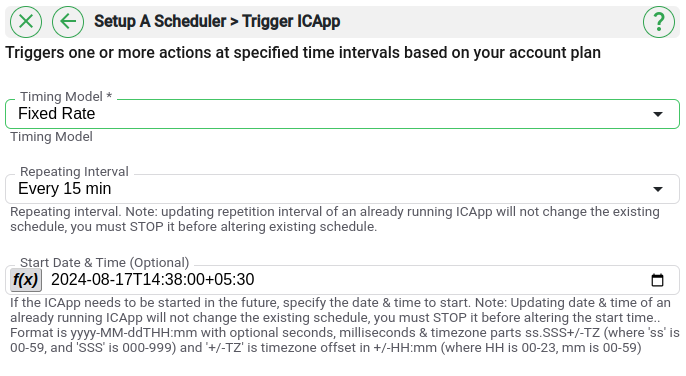
Oncefor one time jobs or set the timing asfixed frequencyfor recurring jobs. - You can also set the timing to
Customand define the frequency you require using a Cron expression. - You can specify when the scheduler should kickoff by specifying the start date and time from the calendar.
You can use this trigger to schedule one or more actions at specified time intervals based on your account plan.
Setting up your Schedular
- To start creating this
, select “Intelligent Connected Apps” icon  from menu, and then click on “Create new
 ” button. - Give a name for your
. - Go to next screen by clicking the green arrow button.
- Select
Schedularas thetriggerfor yourfrom the list of services & drag & drop it to the editor. - From the right hand panel that appears (if not already appearing, double click on the
node), select “Trigger” as your function.

- Select the time interval of the Trigger from
Once,fixed frequency(rate of execution) andCustom. - Optionally, if the schedule needs to be started in the future, you can specify the start date and time.
- If you need to update the date and time of an already running
, stop the before updating the date & time.

- Proceed with the addition of one or more actions for your desired
.
Tip: Whenever you want to select data values from previous steps, click
 button in your workflow.